Post → Edit
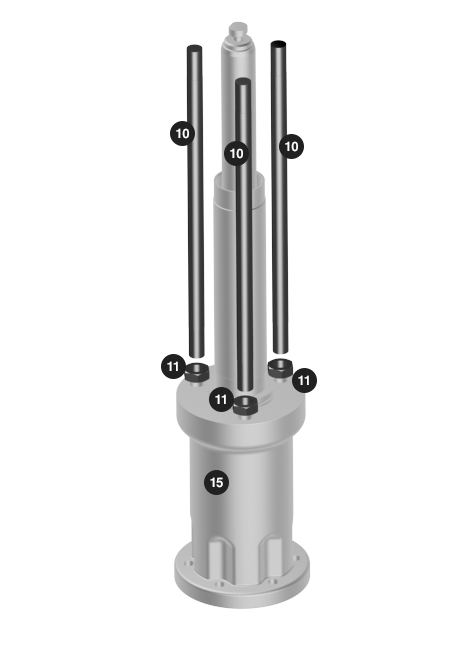
Assembly – Tie Rod Installation
February 28, 2017 20:16Reorient pump components based on markings from step 5. Thread three (Item 11) nuts onto three (Item 10) tie rods. With (Item 11) nuts facing the (Item 15) pressure chamber body, thread the three (...
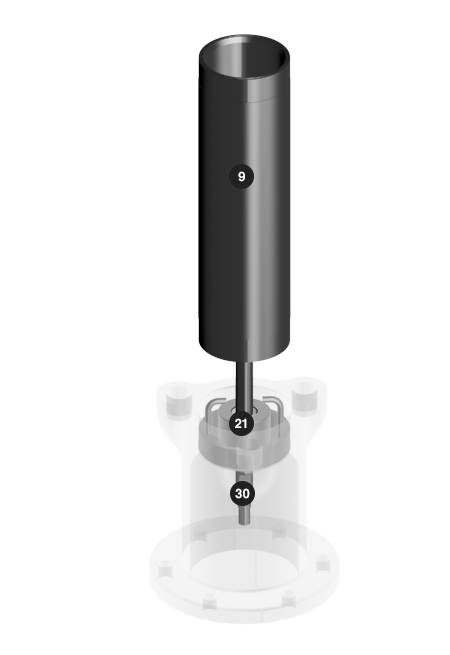
Assembly – Tube
February 28, 2017 18:59With a compatible lubricant, lube the middle packing assembly and the inside of the (Item 9) tube. Starting from either end of the (Item 9) tube (both ends are universal), slide the (Item 9) tube o...
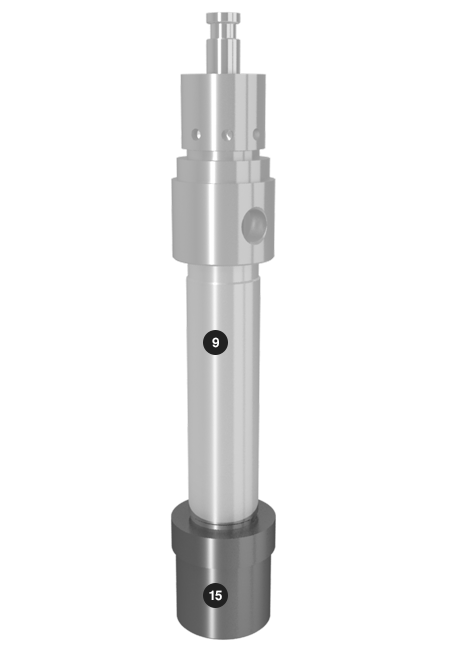
Assembly – Foot Valve to Material Tube
September 14, 2016 20:47Slide (Item 15) foot valve body onto the (Item 9) material tube. NOTE: Care is needed when tightening the tie rods to be sure the flanges around the foot valve body and outlet body are concentric ...
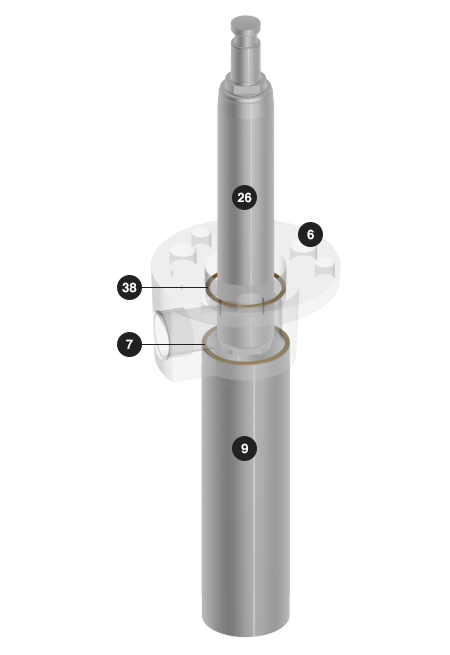
Assembly – Outlet Body Assembly
May 23, 2017 15:04Place the new (Item 38) gasket from the repair kit into the top of the (Item 6) outlet body and place the new (Item 7) gasket from the repair kit into the bottom of the (Item 6) outlet body. Starti...
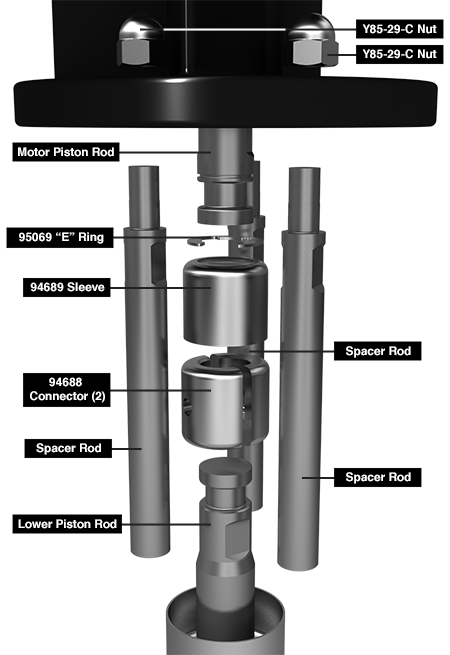
Assembly – Connect Motor / Lower
February 28, 2017 21:50Align the pump motor with the lower pump end. Position the air inlet of the motor 90° from the material outlet. Install the two (91644) connectors and retain with the (91546) sleeve. Slide the (91...
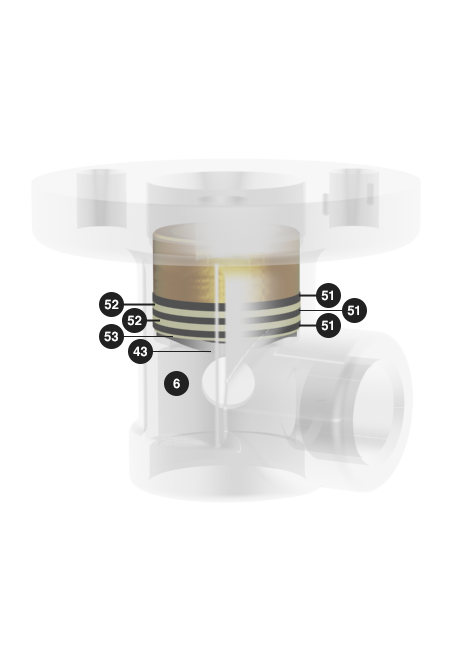
Assembly – Outlet Body Assembly
February 28, 2017 20:16In the top of the (Item 6) outlet body insert: (Item 48) Packing spacer (where applicable) (Item 43) Wave spring (Item 53) Male packing washer (beveled edge up) New (Item 51 & Item 52) “V” pac...
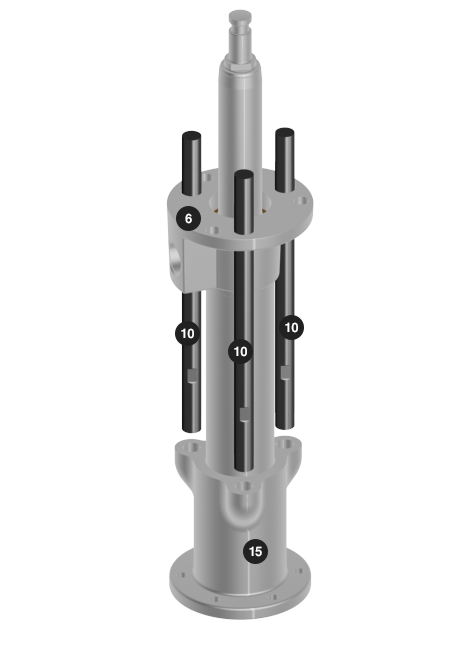
Assembly – Foot Valve to Material Tube (continued)
September 14, 2016 20:48Thread the three (Item 10) studs (tie rods) into the bottom (Item 14) retainer ring. Slide the bottom (Item 14) retainer ring, with three (Item 10) tie rods, onto the (Item 15) foot valve body. Ali...
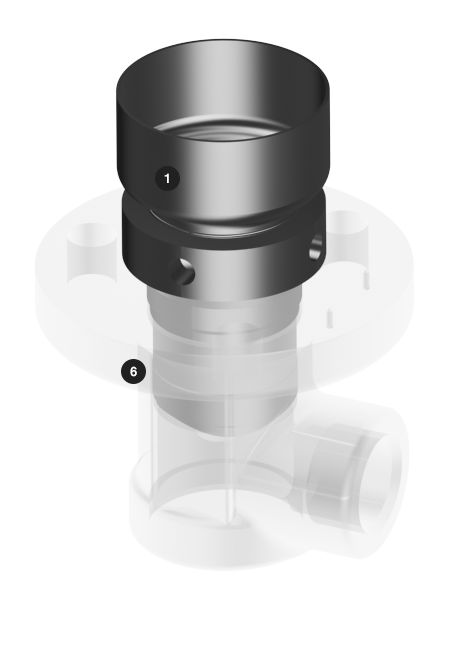
Assembly – Solvent Cup Assembly
February 28, 2017 20:17Apply a small amount of Nickle anti-seize onto the threads of the (Item 1) solvent cup. Thread the (Item 1) solvent cup onto the top of the (Item 6) outlet body hand tight until it seats.
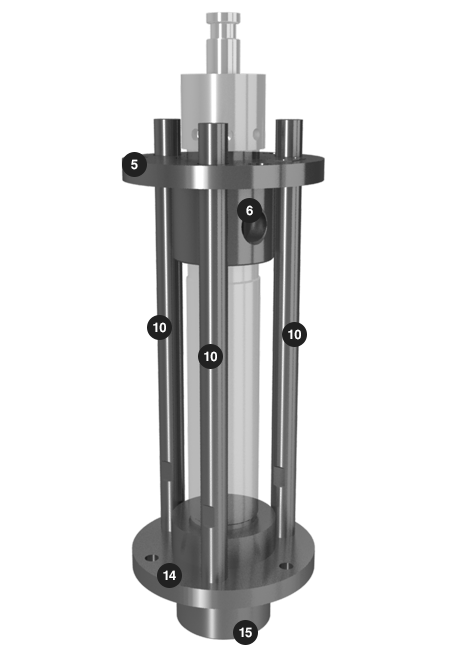
Assembly – Studs
February 28, 2017 19:01Note: In the next steps, follow alignment of previous marks during disassembly to obtain proper orientation. Using a 16" adjustable wrench on the (Item 10) stud flats, thread the three (Item 10) ...
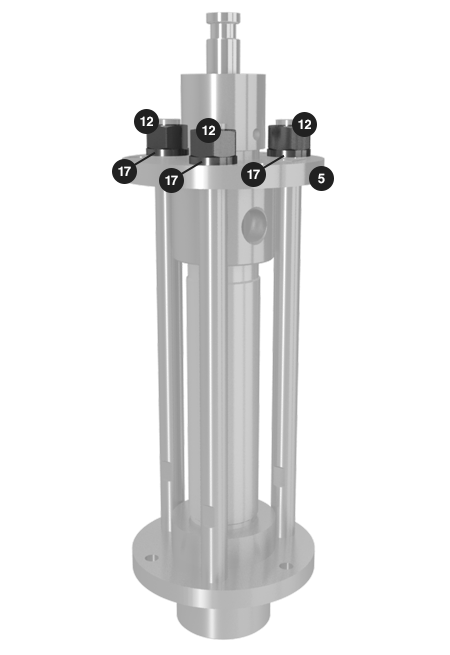
Assembly – Foot Valve to Material Tube (continued)
September 14, 2016 20:50Including the three (Item 17) lock washers, thread the three (Item 12) nuts on top of the three (Item 10) studs (tie rods) at the top of the (Item 5) retainer ring. NOTE: Clean all threaded connec...