Post → Edit
Assembly – Assemble Upper Packing Assembly
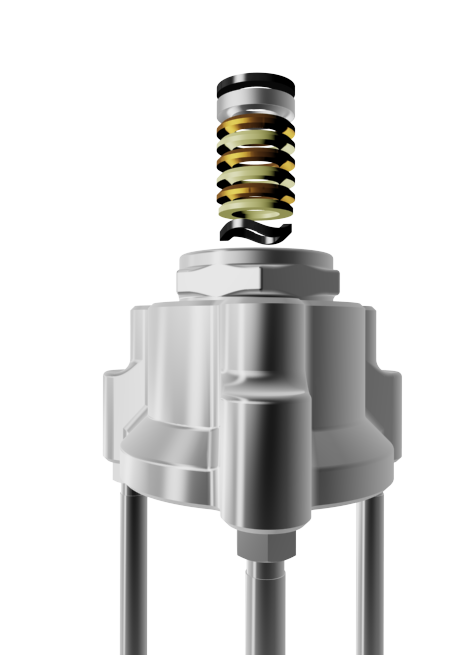
February 28, 2017 21:46In the (Item 2) gland nut assemble: (Item 43) wave spring (Item 53) male washer (flat side facing down) New (Item 51 & Item 52) “V” packings from the repair kit (lips facing down) (Item 50) fe...
Assembly – Valve and Primer Rod Assembly
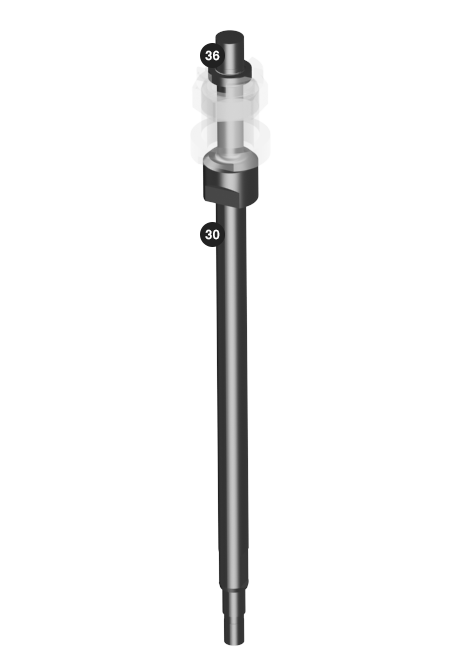
February 28, 2017 20:13If (Item 34) valve rod and (Item 30) primer rod are disassembled, place the (Item 34) valve rod into the vice by the valve rod flats and apply 242 (blue) Loctite onto (Item 30) primer rod threads o...
Assembly – Valve Seat
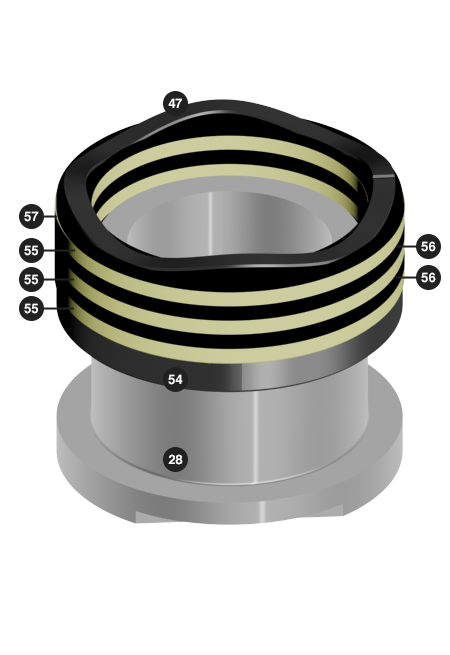
February 28, 2017 18:57Place the (Item 28) valve seat in the vice and secure on flats. Slide the below items over the top of the (Item 28) valve seat: (Item 54) Packing washer (lips up) New (Item 55 & Item 56) “V” p...
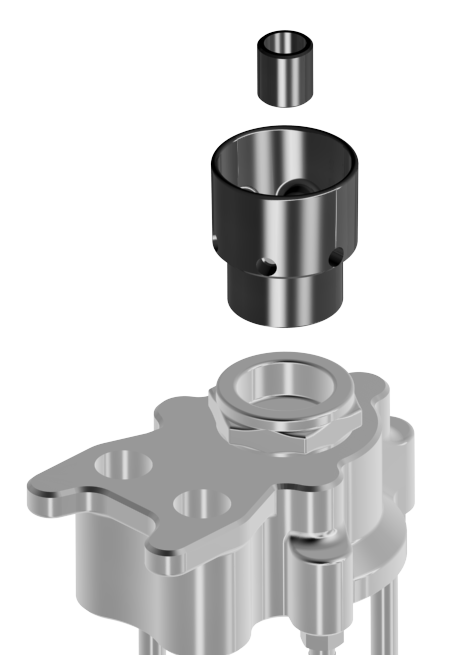
Assembly – Plunger Assembly
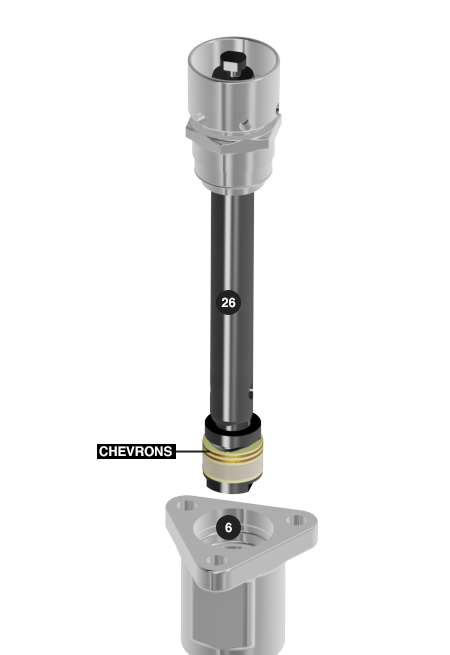
February 28, 2017 15:35Lubricate lower piston chevrons with a compatible lubricant and starting with the bottom end of the (Item 26) plunger assembly, slide (Item 26) plunger assembly into the top of the (Item 6) outlet ...
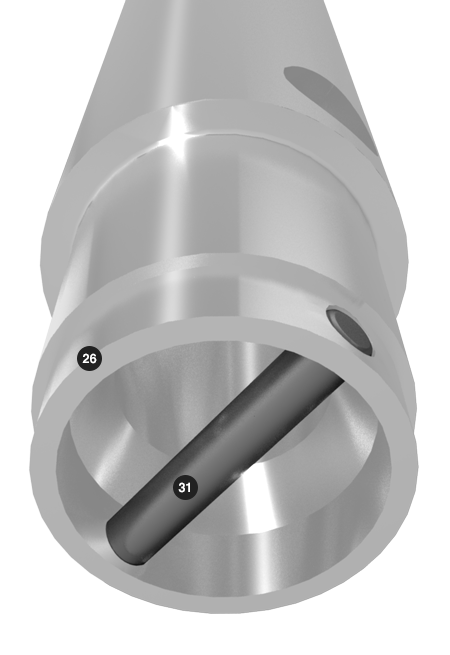
Assembly – Adapter (continued)
September 14, 2016 20:21Place (Item 31) pin into the bottom pin hole on the bottom of the (Item 26) plunger rod.
Assembly – Assemble Solvent Cup
February 28, 2017 21:46Slide (Item 77) bushing into the bottom end of (Item 1) solvent cup. Apply Lubriplate Super FML-2 grease to threads on (Item 1) solvent cup and thread (Item 1) solvent cup into top of (Item 2) glan...
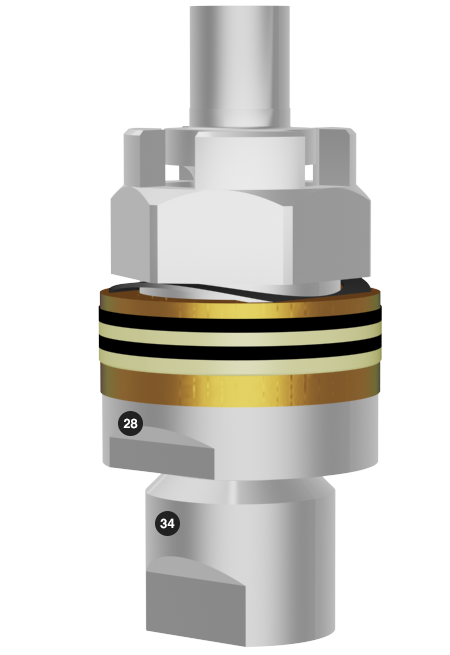
Assembly – Valve Rod Assembly
February 28, 2017 20:13Install the seat and middle packing assembly, starting with the (Item 28) seat into beveled edge of (Item 34) valve rod.
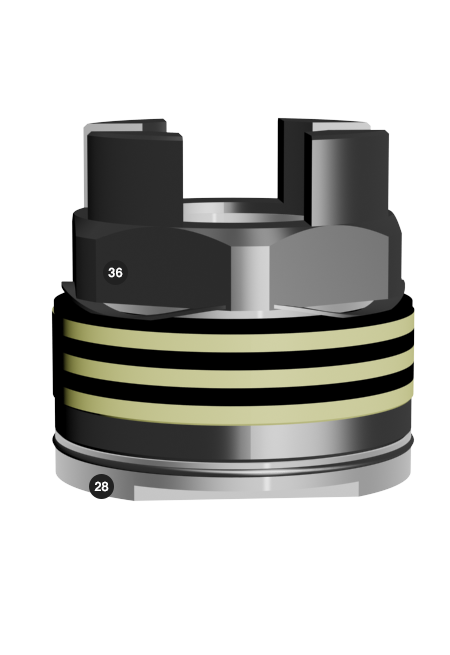
Assembly – Valve Seat Packing Assembly
February 28, 2017 18:57Apply Loctite 242 (blue) to the (Item 28) seat and (Item 36) nut thread and securely thread (Item 36) nut onto (Item 28) seat using an 18" pipe wrench and shop rag or soft cloth on the (Item 36) va...
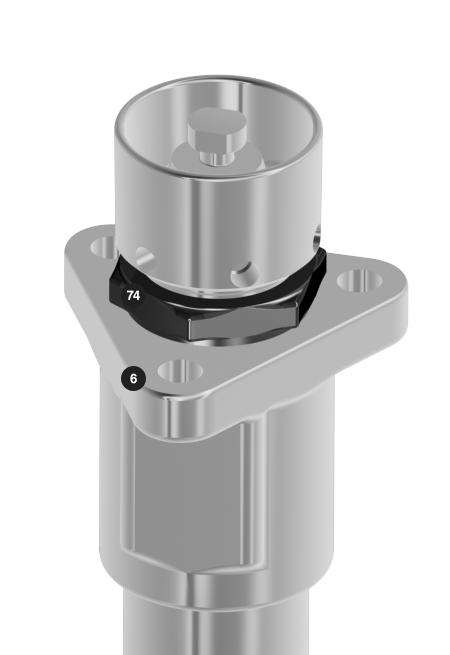
Assembly – Tighten Nut
February 28, 2017 15:35Complete by threading (Item 74) nut into (Item 6) outlet body and using a torque wrench with a 2½" Crowfoot wrench adapter, tighten and torque the (Item 74) nut to 150 ft. lbs. (203.4 Nm.) minimum.
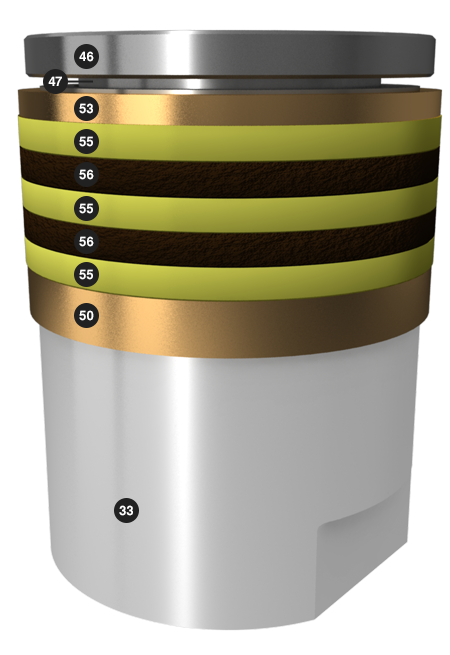
Assembly – Adapter (continued)
September 14, 2016 20:39Assemble onto the (Item 33) adapter: New (Item 50) female packing washer Lubricated (Item 55 & Item 56) “V” packings (Item 53) male packing washer (Item 47) spring washer from the repair kit ...