Post → Edit
Assembly – Assemble Upper Body
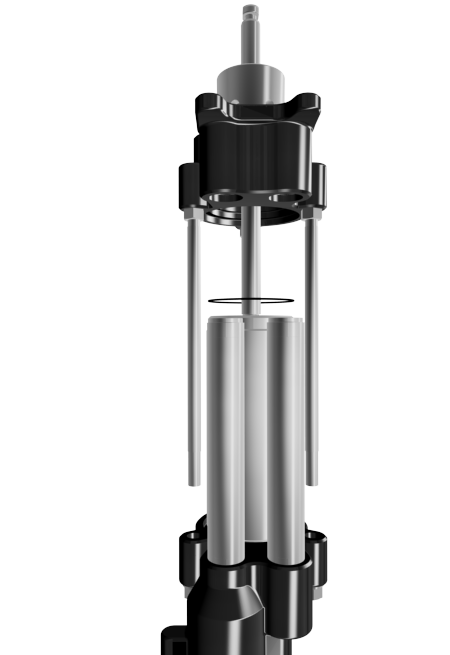
February 28, 2017 21:47Assemble one new (Item 7) o-ring from repair kit into (Item 11) upper body and assemble (Item 11) upper body to (Item 9) tube, aligning three (Item 10) tie rods with (Item 18) lower body.
Assembly – Plunger Rod Assembly
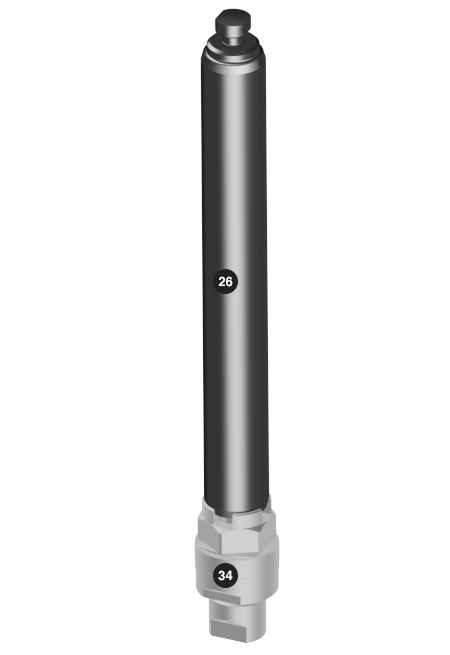
February 28, 2017 20:13Thread the (Item 26) plunger onto (Item 34) valve rod assembly. Using a torque wrench with a ⅞" crow foot attachment, torque to 55-65 ft. lbs.
Assembly – Valve
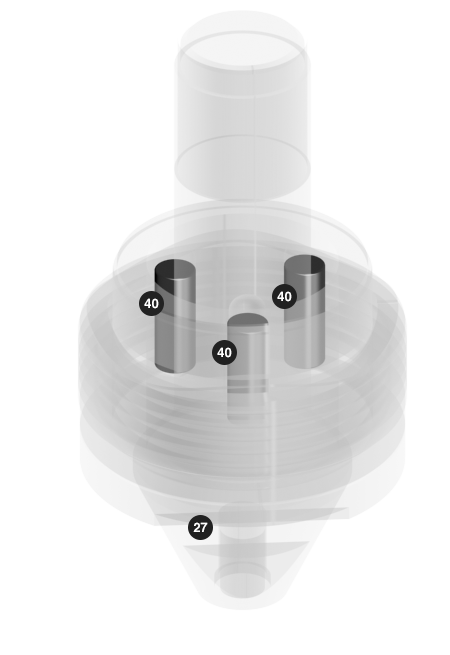
February 28, 2017 18:58Insert the three (Item 40) dowel pins into the appropriate locations on the (Item 27) valve, then slide the middle (recently assembled) packing assembly with the beveled edges facing each other ont...
Assembly – Lower Ball & seat Assembly
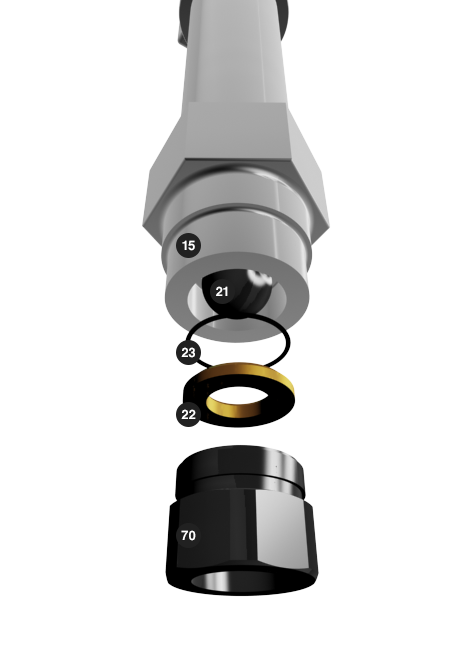
February 28, 2017 15:36NOTE: Loosen the vice, from the (Item 15) inlet body, slightly tilt the pump assembly upwards (pivoting on the (Item 6) outlet body) to keep the (Item 21) ball, (Item 23) o-ring and (Item 22) seat...
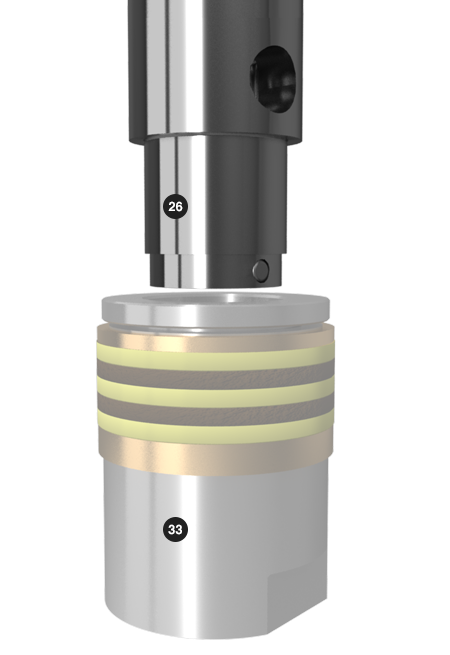
Assembly – Adapter (continued)
September 14, 2016 20:42Thread (Item 33) adapter to the bottom end of the (Item 26) plunger rod. Put the (Item 33) adapter in the vise on the flats. Use the Large Crescent Wrench on the (Item 26) plunger rod flats and sec...
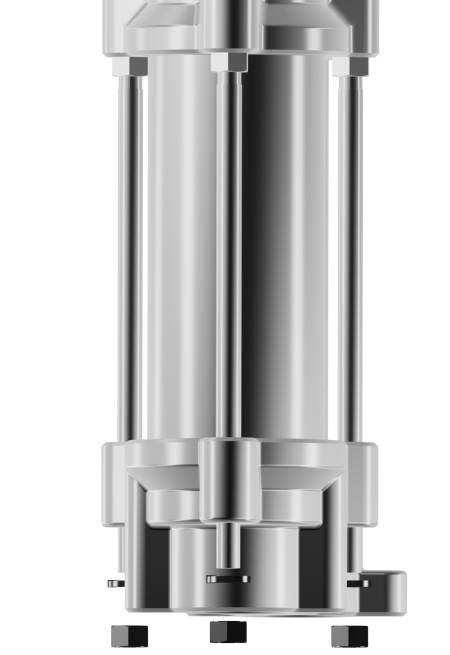
Assembly – Assemble Tie Rods
February 28, 2017 21:47Apply Lubriplate Super FML-2 grease to threads on the remaining three (Item 12) tie rod nuts. Assemble three (Item 8) lock washers and three (Item 12) tie rod nuts to (Item 10) tie rods. Using a ¾"...
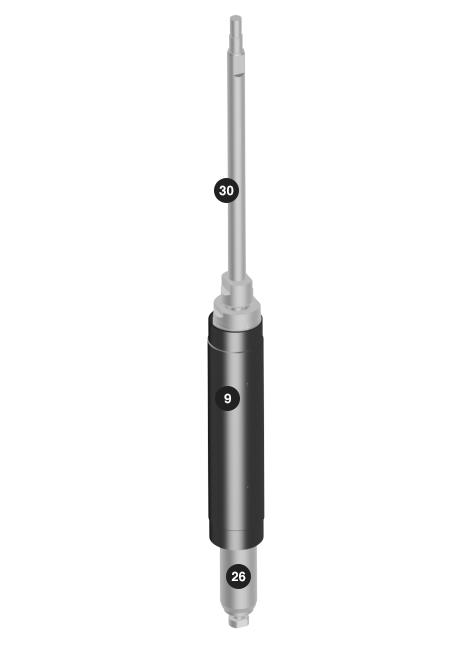
Assembly – Suction Tube Assembly
February 28, 2017 20:14Place the (Item 26) plunger and (Item 30) primer rod assembly in an inverted position (upside down). Lube the packing with a compatible lubricant and slide the (Item 9) tube over the assembly. NOT...

Assembly – Plunger and Valve
February 28, 2017 18:58Apply Loctite 242 (blue) to the threads on (Item 26) plunger and (Item 27) valve and thread them securely using a 16" adjustable wrench on (Item 27) valve wrench flats.
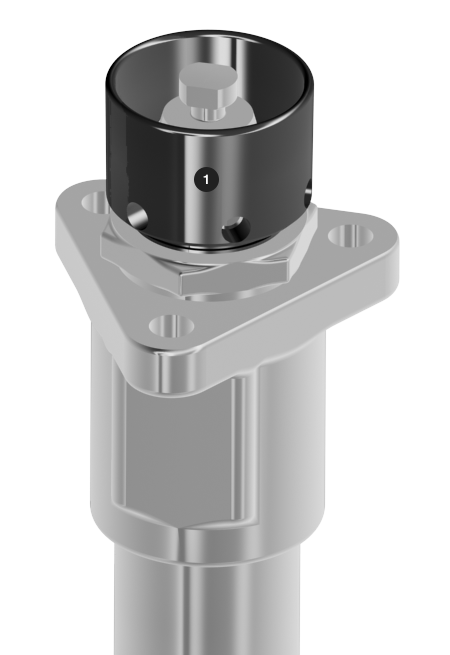
Assembly – Tighten Solvent Cup Assembly
February 28, 2017 15:37Insert ARO part number 93456-1 or a metallic rod with an outer diameter of ⅜" into the designated slots on the (Item 1) solvent cup and tighten the (Item 1) solvent cup mechanically tight.

Assembly – Tube on Outlet Body
September 14, 2016 20:43Take the (Item 26) plunger rod and (Item 6) outlet body assembly. NOTE: Lightly brush “V” packings with a compatible lubricant. Assemble the (Item 9) tube over the (Items 55 & 56) “V”packings...