Post → Edit
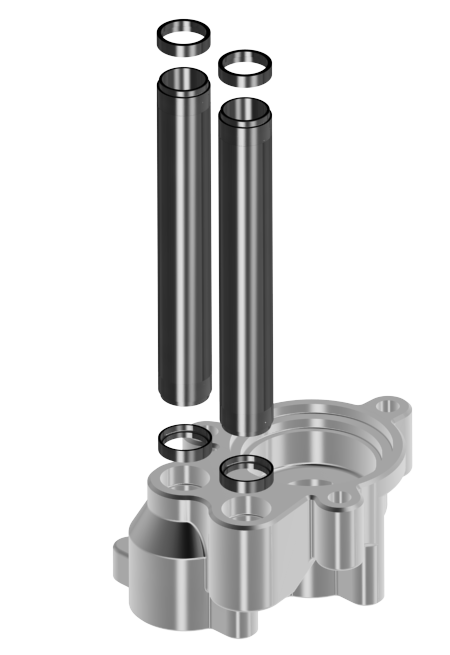
Assembly – Assemble Downtubes
February 28, 2017 21:44Assemble four new (Item 16) seals from the repair kit to each end of the two (Item 17) downtubes, assembling with the large inner diameter of the seals onto the (Item 17) downtubes. Assemble the tw...
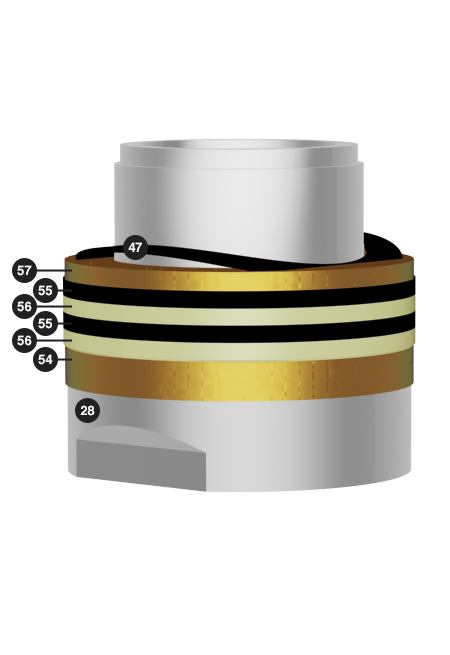
Assembly – Seat and Packing Assembly
February 28, 2017 20:11On the (Item 28) seat, assemble: (Item 54) Female packing washer (lips up) New (Item 55 & Item 56) “V” packings from the repair kit (lips up) (Item 57) Male packing washer (flat side up) New (...

Assembly – Lubricate Packings & Seals
February 28, 2017 18:55Lubricate all packings and seals with a compatible lubricant prior to assembly, as noted in each step.
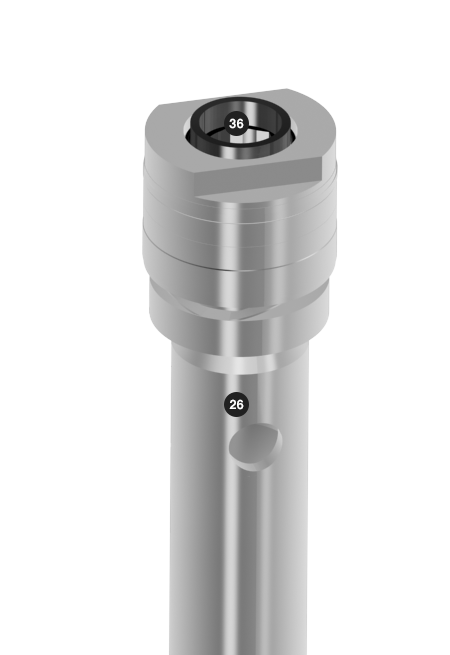
Assembly – Assemble Adapter
February 28, 2017 15:32By the flats on the button end, place the (Item 26) plunger into the vice and secure. NOTE: When placing (Item 26) plunger into the vice use a shop rag or soft cloth to prevent any scratches, dent...
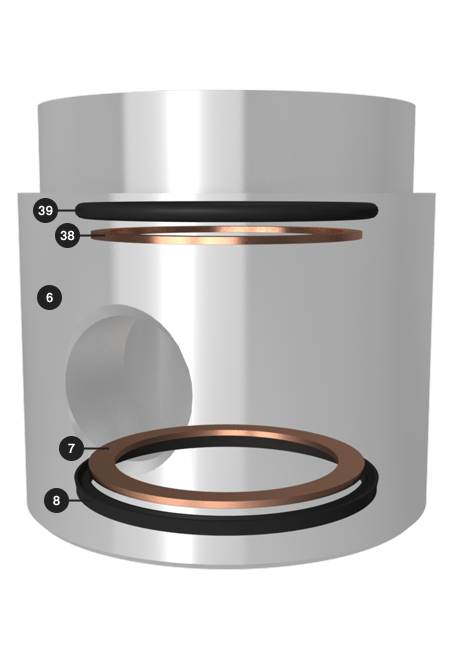
Assembly – Outlet Body
September 14, 2016 20:15In the bottom of the (Item 6) outlet body, install the: New (Item 7) copper gasket from the repair kit New lubricated (Item 7) poly seal packing from the repair kit Turn (Item 6) outlet body over...
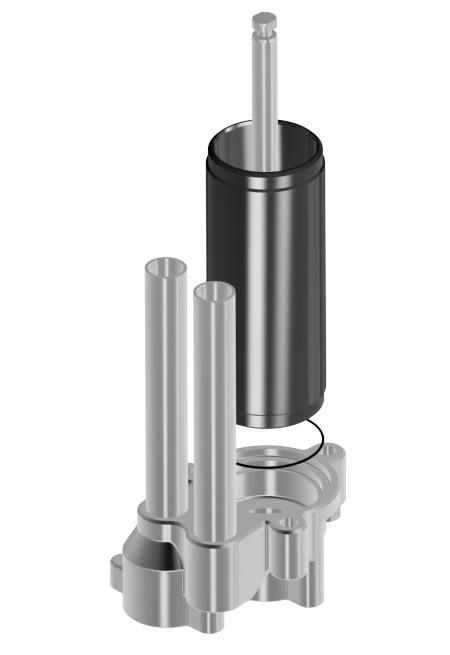
Assembly – Assemble Tube & Pump Rod
February 28, 2017 21:44Assemble one new (Item 7) o-ring from the repair kit and (Item 9) tube into (Item 18) lower body making certain that the button end of the (Item 26) pump rod is facing up.
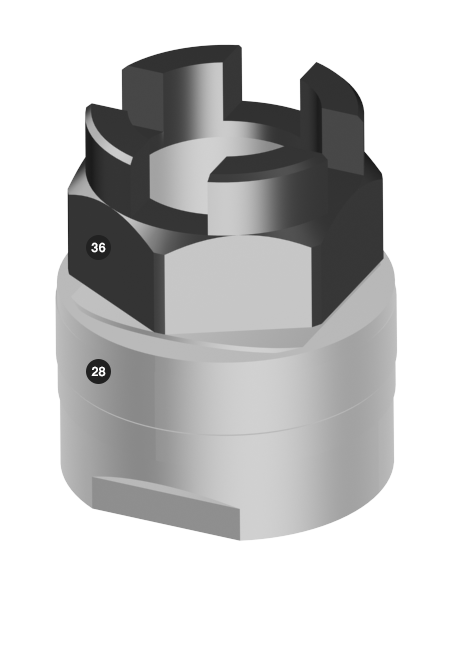
Assembly – Seat Assembly
February 28, 2017 20:12Apply 242 (blue) Loctite to the threads on (Item 28) seat. Place (Item 28) seat into the vice and secure on the (Item 28) seat flats. With a 15" adjustable wrench secure the (Item 36) valve seat nu...
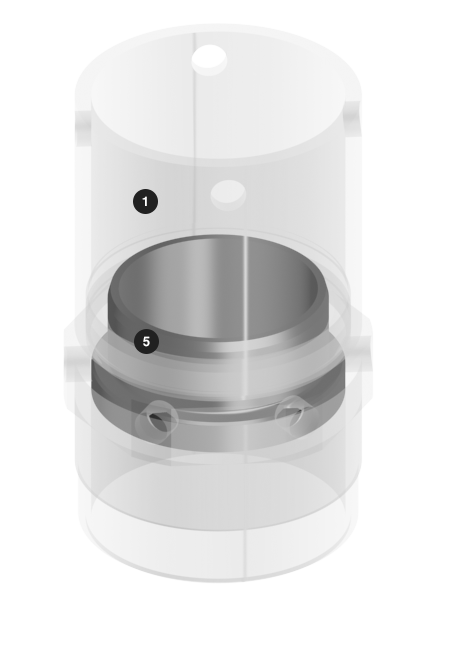
Assembly – Solvent Cup / Packing Nut Bushing
February 28, 2017 18:55Through the bottom of the (Item 1 & Item 2) solvent cup & packing nut assembly insert the (Item 5) bushing with the smaller diameter end in first.
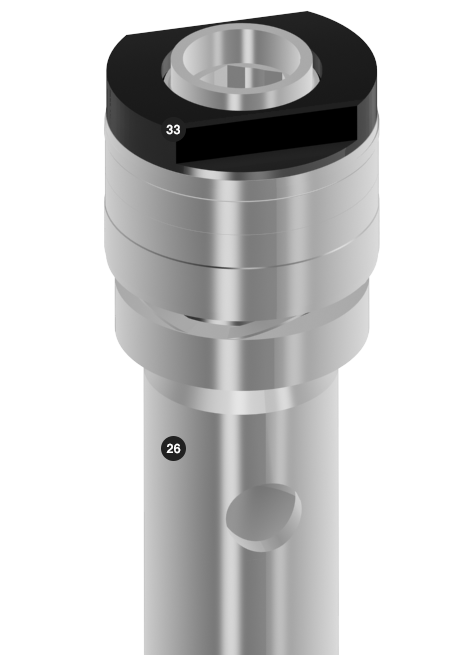
Assembly – Piston
February 28, 2017 15:33Using a torque wrench with a 1¼" Crowfoot wrench adapter, tighten and torque the (Item 33) piston to 50 ft. lbs. (67.8 Nm) minimum. Remove (Item 26) plunger from vice.
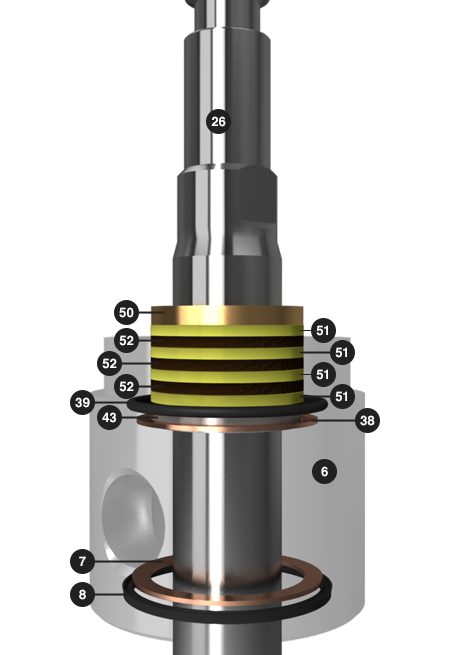
Assembly – Install Plunger Parts
September 14, 2016 20:16Slide the bottom end of the (Item 26) plunger rod into the bottom of the (Item 6) outlet body. Install the below items one at a time onto the (Item 26) plunger rod: (Item 43) multiple wave spring ...