Post → Edit
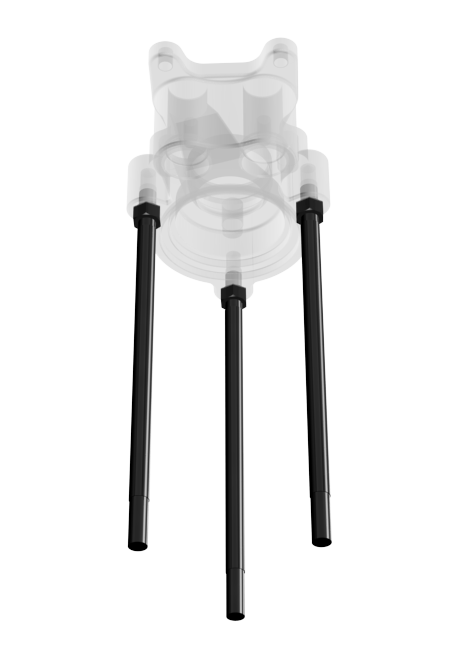
Assembly – Assemble Tie Rods to Upper Body
February 28, 2017 21:45Apply Lubriplate Super FML-2 grease to threads on three (Item 12) nuts. Screw three (Item 12) nuts onto top end of (Item 10) tie rods and screw tie rods into (Item 11) upper body. With a ¾" box/ope...
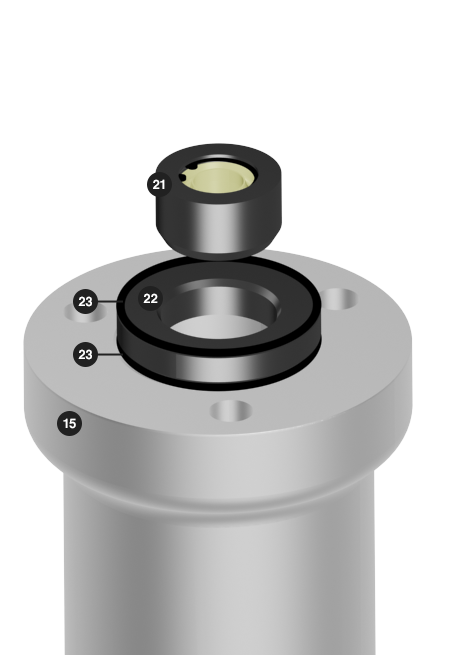
Assembly – Pressure Chamber Body
February 28, 2017 20:12In the (Item 15) pressure chamber body install: New (Item 23) O-ring from the repair kit (Item 22) Seat (with the beveled seated side faced up) (Item 21) Check (beveled edge first, snap ring facin...
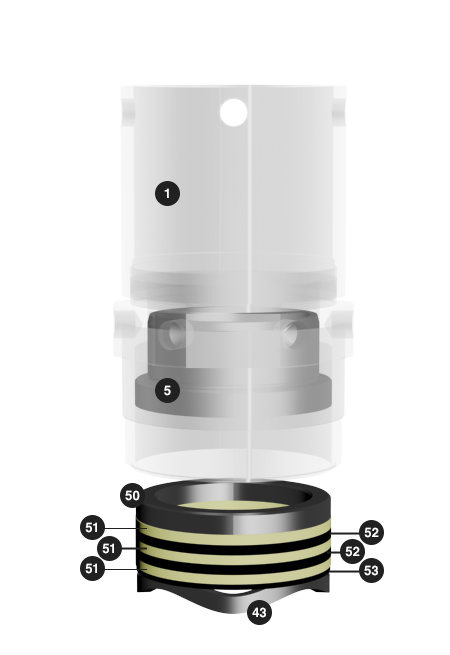
Assembly – Solvent Cup / Packing Nut
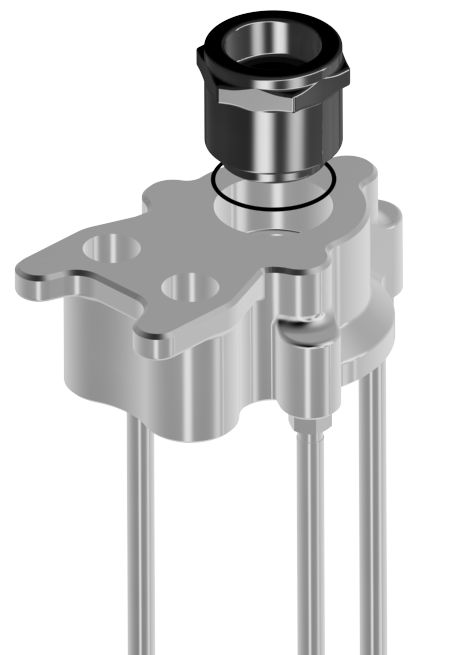
February 28, 2017 18:56Flip (Item 1 & Item 2) solvent cup and packing nut assembly over while holding in place the (Item 5) bushing. From the bottom end of the (Item 2) packing nut insert: (Item 50) Packing washer (...
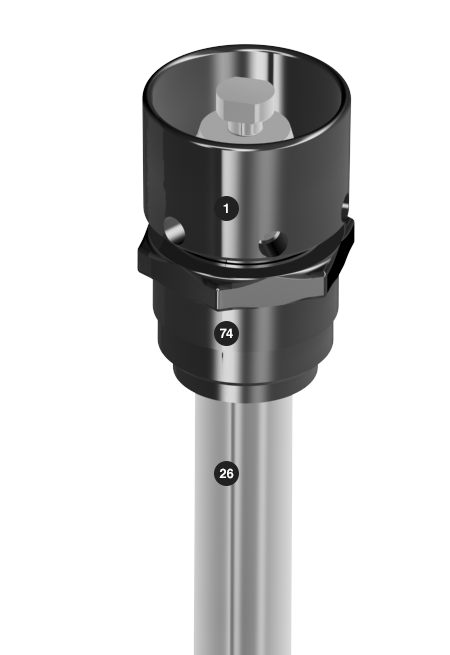
Assembly – Solvent Cup & Plunger Assembly
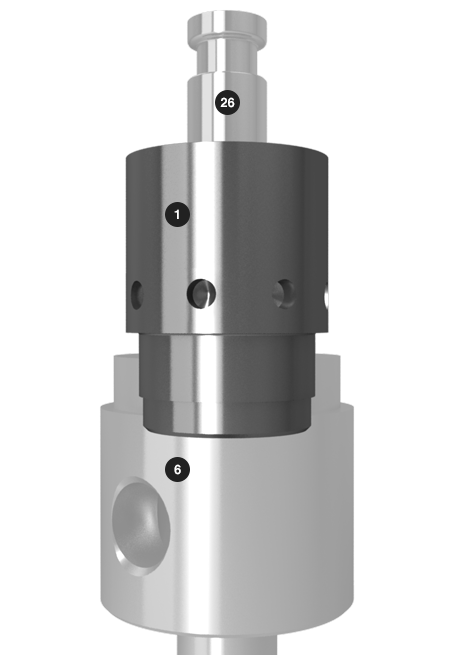
February 28, 2017 15:33Starting from the bottom end of the (Item 74) nut, slide the (Item 74) nut and (Item 1) solvent cup assembly over the top (button end) of the (Item 26) plunger. NOTE: May need compatible lubricant...
Assembly – Solvent Cup
September 14, 2016 20:17Slide the bottom end of the (Item 1) solvent cup over the button end of the (Item 26) plunger rod. Continue to slide the (Item 1) solvent cup over the (Item 50) female packing washer, (Items 51 &am...
Assembly – Assemble Gland Nut
February 28, 2017 21:45Apply Lubriplate Super FML-2 grease to threads on (Item 2) gland nut. Assemble new (Item 38) o-ring from the repair kit into (Item 11) upper body, securing with the (Item 2) gland nut until it bott...

Assembly – Check Stop Into Pressure Chamber Body
February 28, 2017 20:12With the (Item 25) check stop in the proper orientation (grooves up), install the new (Item 24) o-ring from the repair kit into the lower grove on the (Item 25) check stop. Insert the (Item 25) che...
Assembly – Primer Rod to Valve
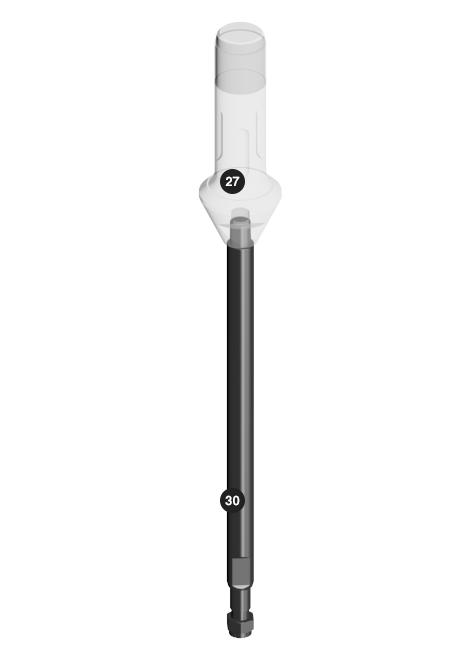
February 28, 2017 18:56If the (Item 30) primer rod was replaced, apply Loctite 242 to the appropriate threads and securely thread into the bottom end of the (Item 27) valve with 16" adjustable wrench on the (Item 30) pri...
Assembly – Outlet Body Assembly
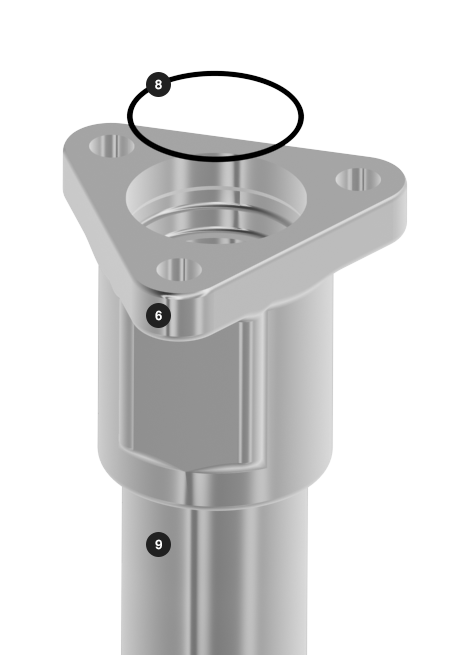
February 28, 2017 15:33Securely place (Item 6) outlet body, (Item 9) tube and (Item 15) outlet body assembly horizontally into the vice by the (Item 6) outlet body. NOTE: When placing the assembly into the vice use a sh...
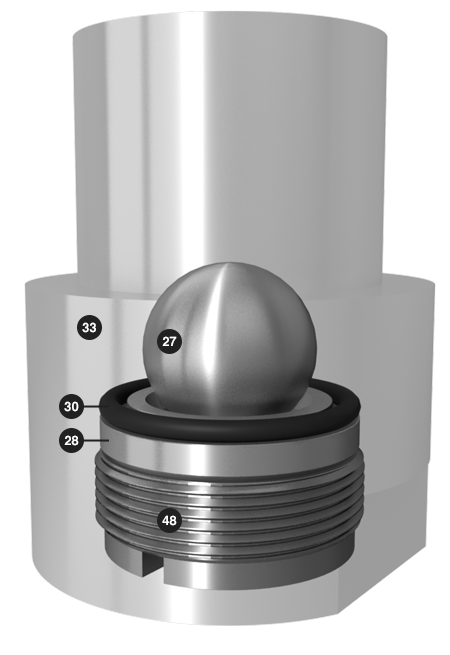
Assembly – Adapter
September 14, 2016 20:19Insert the new lubricated (Item 30) o-ring from the repair kit into the bottom of the (Item 33) adapter. Make sure that the opening on top of the (Item 33) adapter is covered to hold the (Item 27) ...